Your cardboard template is supplied to help with installing your letter and tracks correctly. Though we have tried and tested our adhesive tracks on a vast variety of surfaces, there are occasions that additional gluing is required, if you experience any problems. Your tracks are supplied NOT to be used for outdoor use without gluing, riveting or screwing into position. If using a ‘super glue’ ensure you use a glue isn’t instant, so allows moment for a few minutes.
Here’s our step by step guide for applying your tracks with the cardboard template.
BEFORE YOU START TO STICK YOUR TRACKING:
Always have the letters and tracking to hand at the same time. Never apply the tracks without the letters to hand. The card board template is designed to go into the tracks’ capacities, as if it were a letter.
During the assembly process constantly test the letters in the tracks to ensure the fit remains snug, but not too tight as for the letters to start bending. You should be able to slide the letters, but only just. Once completed, and up n running feel free to bend and ping in your new letters. They won’t crack or crease!
Always lay done the tracking first without peeling of the adhesive tape to understand where you should start your first track and where your last track will finish!
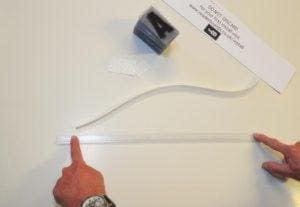
STEP 1
REMOVE BACKING FROM TRACK & LAY DOWN FIRST TOP TRACK
Use a spirit level or the pre printed grid on your novelty sign to ensure TOP rail track is parallel.
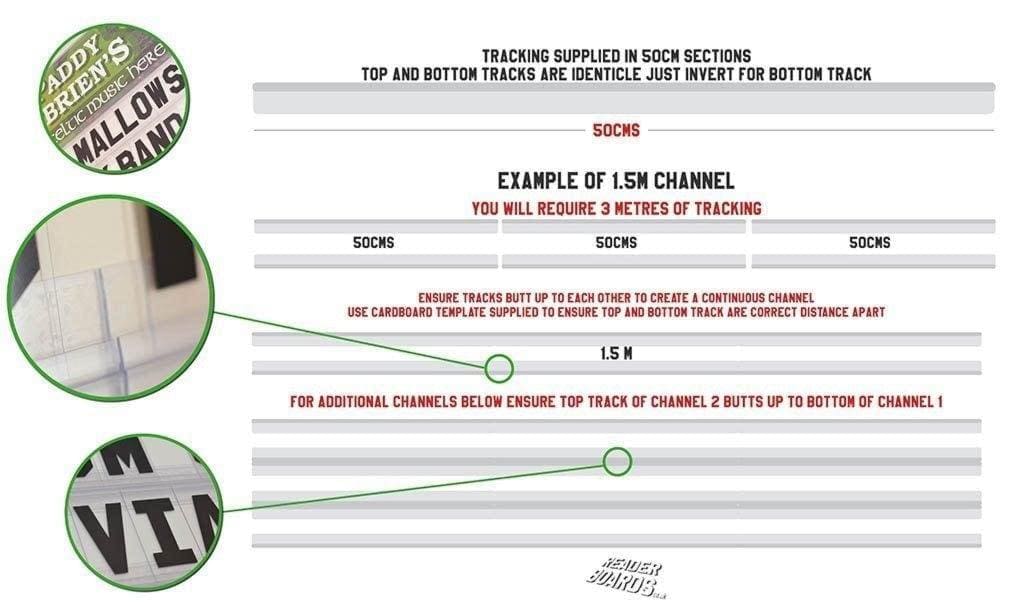
A channel comprises on top and bottom track of 50cm sections which are identical.
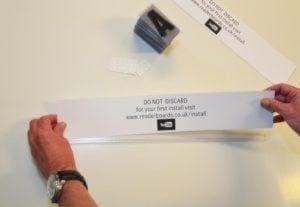
STEP 2
DROP TEMPLATE INSIDE TOP TRACK’S CAPACITY
ENSURE IT’S SITTING IN THE TRACKS CAPACITY
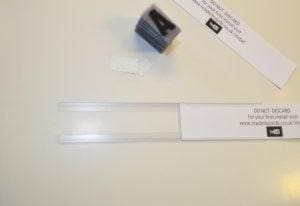
STEP 3
REMOVE BACKING FROM TRACK & PLACE BOTTOM TRACK OF CHANNEL 1 INTO TEMPLATE. ENSURE IT’S SITTING IN THE TRACKS CAPACITY
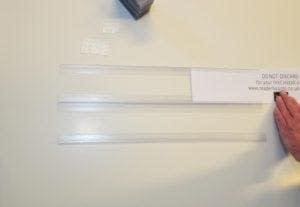
STEP 4
FOR NEXT CHANNEL ENSURE TRACK ON CHANNEL 2 SITS TIGHT ON BOTTOM OF CHANNEL 1 AND REPEAT PROCESS
STEP 5
ONCE ALL IN POSITION RUB DOWN ALL TRACKING BY PUSHING DOWN FIRMLY WITH THE REVERSE OF A SMALL SPOON. THE CORRECT PRESSURE HAS BEEN APPLIED WHEN THE GLUE ON THE TRACK BEGINS TO VANISH
TIP
IF USING A CHANNEL GREATER THAN ONE SECTION (50CMS) YOU WILL BE PROVIDED WITH MORE CARDBOARD TEMPLATES. PLACE ONE TEMPLATE SECTION ON TOP OF ANOTHER, MAKE SURE THEY ARE SITTING PERFECTLY ON TOP OF EACH OTHER AND TAP ONE SIDE EDGE. THIS WILL CREATE A LONGER TEMPLATE
***IF USING OUTDOORS WITH A WEATHER SHIELD TRY AND AVOID WEST FACING POSITIONS. OVER PRELONGED PERIODS, IF YOU DON’T CHANGE THE SIGN REGULARLY, THE LETTERS CAN GET DAMAGED BY THE SUN AND WARP IN THE HEAT***
